 ultimate-guide
Step by Step Kitchen Renovation Checklist for 2026
Table of Contents
- Phase 1: Define Your Scope and Set a Realistic Budget
- Phase 2: Design, Floor Plan, and Material Sourcing
- Phase 3: Kitchen Renovation Permit Requirements and Contractor Selection
- Phase 4: Demolition, Rough-In, and Installation Sequence
- How Long Does a Kitchen Renovation Take?
- Hidden Costs, Temporary Kitchen Setup, and Waste Disposal
- Frequently Asked Questions
Last Updated: September 13, 2026
Phase 1: Define Your Scope and Set a Realistic Budget
A step by step kitchen renovation checklist starts with one job: deciding exactly what you are changing before anyone touches a cabinet door. Scope is the single biggest driver of cost and timeline, and it is the one variable you fully control. This guide from Restmark Renovations walks through the four phases we use on every project, from first sketch to final walkthrough.
The most common mistake is treating a kitchen renovation like a shopping list instead of a construction project. Homeowners pick a backsplash and a range, then discover the layout itself needs moving, which changes the plumbing, the electrical, and the budget. Decide the scope first:
- Cosmetic refresh: cabinet refacing, new countertops, paint, and hardware. No layout changes.
- Mid-range remodel: new cabinetry, flooring, lighting, and appliances within the existing footprint.
- Full gut renovation: walls move, services get re-routed, and the room is rebuilt.
Your kitchen renovation budget breakdown should split roughly into cabinetry and countertops as the largest line, followed by labour, appliances, flooring, and a contingency you protect fiercely. Pricing depends on your room size, finish level, and how much structural work is involved, so get a written estimate rather than working from a rule of thumb. Build your wishlist, then rank it: must-have, nice-to-have, and cuttable. That ranking is what keeps a project honest when the first surprise appears.
Phase 2: Design, Floor Plan, and Material Sourcing
Design is where a kitchen renovation checklist earns its keep, because every later decision depends on the floor plan. A good layout follows the work triangle between sink, stove, and refrigerator, keeps clearances for doors and drawers, and puts the lighting plan on paper before drywall goes up. If you are not a designer, this is the stage to lean on someone who is, rather than guessing at dimensions.
Material sourcing runs in parallel, not after. Cabinetry has the longest lead time of anything in the room, so it should be ordered as soon as the layout is locked. Countertops are templated after cabinets are installed, which means a stone selection made too early can sit in a warehouse for weeks. Sequence your selections:
- Lock the floor plan and appliance sizes.
- Choose cabinetry and confirm the order date.
- Select countertops, backsplash, and flooring.
- Finalize the color palette and lighting fixtures last, once finishes are known.
Appliance selection deserves its own pass. Measure the actual units, not the spec sheet, and confirm door swings and ventilation requirements before the order is placed. A range hood that cannot vent to the exterior changes the whole ceiling plan.
Phase 3: Kitchen Renovation Permit Requirements and Contractor Selection
Kitchen renovation permit requirements depend on what you are changing, and this is where homeowners get caught. Cosmetic work such as painting, refacing, and swapping a like-for-like appliance typically needs no permit. Moving plumbing, adding or relocating electrical circuits, removing a load-bearing wall, or changing structural elements generally does (Building permits | Citizen’s guide to land use planning). Your municipality's building department is the authority here, and requirements vary by jurisdiction, so confirm before demolition rather than after.
A permit is not a single approval. It is a sequence of inspections tied to the build, and each one has to pass before the next stage can be closed up:
- Demolition and rough-in inspection, framing, plumbing, electrical, and HVAC are inspected while the walls are still open.
- Insulation and vapor barrier inspection, required in most jurisdictions before drywall goes on.
- Final inspection, covers the completed electrical, plumbing, and structural work, and is what closes the permit.
Skipping or failing an inspection does not just delay the project. Unpermitted work is a disclosure problem at resale, an insurance problem if something fails, and a code-compliance problem the next owner inherits (Read IN Focus views and analysis). Building codes govern the parts you cannot see: ventilation, electrical clearances, and structural support. A permit is the record that the work was inspected.
Then there is contractor selection, which matters more than any finish choice. Ask for:
- A written scope that lists what is included and, just as importantly, what is not
- A payment schedule tied to project milestones, never to calendar dates
- Proof of licensing and insurance, verified rather than promised
- References from recent projects you can actually call
- A named site supervisor, not just a sales contact
For older homes, expect surprises behind the walls. Dated wiring, undersized framing, and previous DIY work are common, and the honest answer is that no contractor can promise zero surprises. What a good contractor can promise is a process for handling them: a written change order, a cost, and a decision point before work continues.
This is also where the hidden costs live. Permit fees, engineering letters for structural changes, and code-upgrade work, bringing an undersized panel up to current requirements, for example, are rarely in the original quote because they are not visible until the walls open. Ask your contractor to flag which items are 'allowances' versus 'fixed,' and hold a contingency specifically for code-driven surprises rather than finish upgrades.
Phase 4: Demolition, Rough-In, and Installation Sequence
Demolition comes first, and it is messier than most people expect. The room gets stripped back to studs and subfloor, services are capped, and the true condition of the space is finally visible. This is the moment when hidden problems surface, subfloor rot under the sink, a previous owner's junction box buried in a wall, a drain line that runs through the middle of where the new island needs to go. This is exactly why the contingency exists.
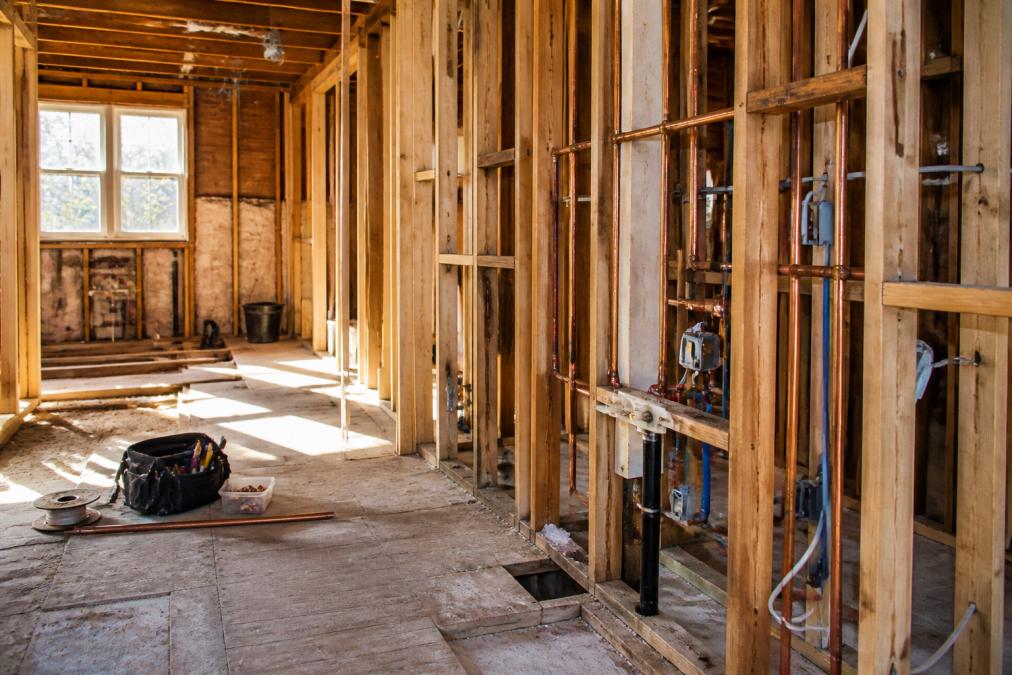
Rough-in follows: plumbing and electrical wiring run through the open walls, HVAC ducting is adjusted, and the inspection happens before anything is closed up. The order from here is not flexible, and each step depends on the one before it:
- Rough-in inspection, plumbing, electrical, and HVAC signed off while walls are open.
- Insulation and drywall, walls closed, taped, and primed.
- Flooring, installed before cabinets in most layouts, so the cabinets sit on a finished surface rather than being cut around.
- Cabinetry, set, leveled, and shimmed; this is what countertops are templated against.
- Countertop templating and fabrication, a gap of days to weeks between template and install, depending on material.
- Backsplash, tiled after countertops so the tile sits on top of the stone, not behind it.
- Plumbing fixtures and appliances, connected once surfaces are in.
- Finish carpentry, trim, and paint touch-ups, the last visible layer.
Break the order and you create problems you cannot undo. Install countertops before cabinets and there is nothing to support them. Lay flooring after cabinets and you either cut around them badly or lose the ability to replace a plank later. Tile the backsplash before the countertop and the stone has to be notched around the tile.
Project management holds the sequence together. Ask your contractor for a written schedule with the inspection dates marked, because inspections are the fixed points the rest of the timeline bends around. A punch list at the end catches the small items: a drawer that rubs, a gap in the trim, a light that flickers. Walk the room with the contractor and write everything down before the final payment is released.
Do not release the final payment before the punch list is complete and the final inspection has passed. Retention, holding back a percentage until the work is signed off, is standard practice and protects you if a fix is needed after the crew has moved on.
How Long Does a Kitchen Renovation Take?
A cosmetic kitchen refresh typically takes two to three weeks, while a full gut renovation commonly runs eight to sixteen weeks from demolition to final walkthrough (CMHC Improvement). The range is wide because lead times and hidden conditions, not labour speed, usually decide the finish date.
Cabinetry is the long pole. Custom orders can take considerably longer than stock, and countertop templating adds another stretch after cabinets are set. Permits and inspections add time you cannot compress, and any structural change adds design and engineering work before demolition even starts. Treat the schedule as a sequence of dependent steps rather than a single deadline, and ask your contractor for project milestones with dates attached to each phase.
Do not schedule a kitchen-dependent event, a holiday gathering or a move-in date, against the early end of the estimate. The early end assumes nothing goes wrong behind the walls.
Hidden Costs, Temporary Kitchen Setup, and Waste Disposal
Three items appear on almost no checklist and on almost every final invoice. Plan for them now.
Hidden cost breakdown: the visible budget covers finishes and labour. The invisible one covers what demolition reveals, plus permits, disposal fees, temporary storage, and eating out for weeks. Older homes carry more of this risk than newer ones, and no inspection can fully eliminate it.
Temporary kitchen setup: a full renovation means no working sink or stove for the duration. Set up a temporary station in another room with a microwave, kettle, mini-fridge, and a washing basin, and keep a small supply of paper plates and disposable cutlery. It sounds trivial until week three.
Waste management and disposal: demolition produces a surprising volume of material, and disposal is a real line item. Ask early where the debris goes, whether a bin permit is required, and whether reusable items such as old cabinets or appliances can be donated or resold rather than landfilled.
Post-renovation maintenance: new finishes need care. Seal stone countertops on schedule, avoid abrasive cleaners on refinished surfaces, and touch up caulking before small gaps become water damage. Register appliance warranties and keep the finish schedule somewhere you will find it.
A kitchen renovation is a sequence problem before it is a design problem. Get the order right, price the surprises in advance, and the project stays predictable. Restmark Renovations handles that sequence for homeowners across the Hamilton, Burlington, and Niagara regions, pairing refined craftsmanship with transparent pricing and a clear timeline, so you always know what happens next. Our team manages permits, trades, and scheduling, keeps the workspace clean and organized throughout, and tailors the design to how your household actually cooks. Get a free estimate from Restmark Renovations and start your renovation with a plan you can trust.
Frequently Asked Questions
What are the steps involved in renovating a kitchen?
A kitchen renovation follows a set sequence: define scope and budget, design the layout and source materials, obtain permits and hire a contractor, then demolition, rough-in plumbing and electrical, drywall, cabinetry, countertops, backsplash, flooring, and finish carpentry. A final punch list walkthrough closes the project. Skipping early planning steps usually causes delays later.
Do I need a building permit for a kitchen renovation?
Permits are typically required when you move plumbing fixtures, add or relocate electrical circuits, alter structural walls, or change HVAC ductwork. Cosmetic updates like cabinet refacing, painting, or new countertops on existing bases usually do not need one. Requirements vary by municipality, so confirm with your local building department before demolition begins.
How long does a kitchen renovation take to complete?
A full kitchen renovation commonly runs eight to sixteen weeks from demolition to final walkthrough. Cosmetic refreshes can finish in two to three weeks. Timelines stretch when custom cabinetry is ordered, structural changes are needed, or permit approvals are slow. Older homes often add time for surprises behind the walls.
What is the most expensive part of redoing a kitchen?
Cabinetry and labor typically consume the largest share of a kitchen renovation budget, followed by countertops and appliances. Plumbing and electrical rough-in costs climb quickly in older homes where wiring and pipes need replacing. Getting a detailed quote before work starts helps you see where the money actually goes.