 listicle
7 Small Bathroom Layout Ideas for 2026
Table of Contents
- 1. Corner Shower with Floating Vanity
- 2. Wall-Mounted Fixtures for Maximum Floor Space
- 3. Open Concept Wet Room Design
- How to Waterproof a Bathroom Shower Floor
- 4. Statement Tiles and Visual Depth
- 5. Pocket Doors and Space-Smart Layout Configurations
- Building Code Requirements for Bathroom Clearances
- 6. Recessed Shelving and Clutter-Free Storage
- Frequently Asked Questions
Last Updated: October 2, 2026
1. Corner Shower with Floating Vanity
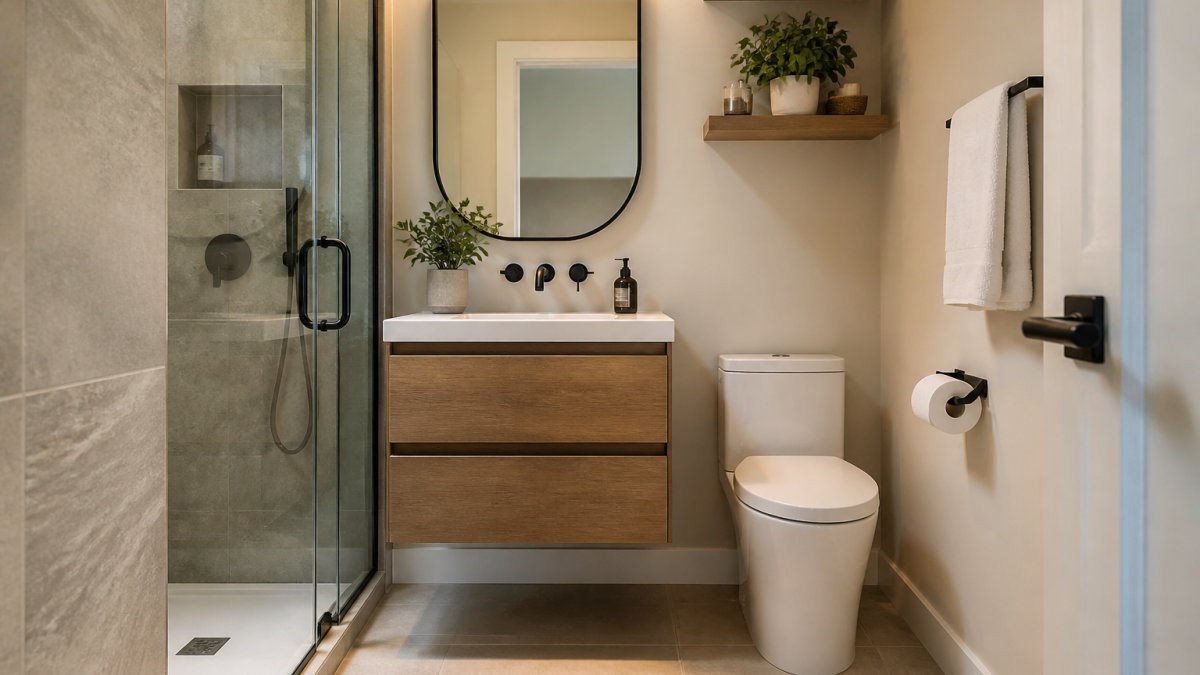
A corner shower paired with a floating vanity is one of the most practical small bathroom layout solutions for tight floor plans. This configuration maximizes usable floor space by positioning the shower in a corner and lifting the vanity off the ground, creating an unobstructed sight line that makes the room feel larger than it actually is.
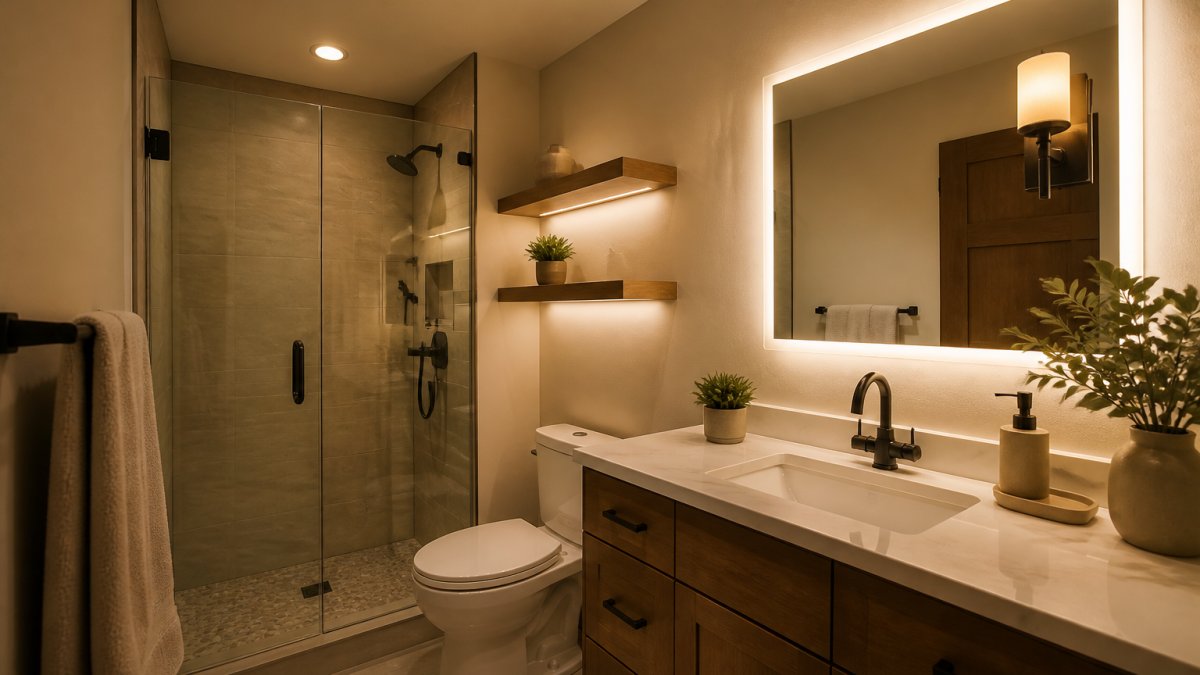
The corner placement keeps plumbing runs efficient and contained. A floating vanity typically sits 30-90 cm above the floor, which opens up visual breathing room and makes cleaning easier. This approach works especially well in 5x7 or 5x8 bathrooms where every square foot counts. The space beneath the vanity can accommodate a small storage basket or simply remain open for a cleaner aesthetic.
When designing this layout, consider the shower entrance carefully. A frameless glass enclosure or a simple shower curtain rod keeps sightlines clear. Pair this with a shallow-depth vanity cabinet (45-50 cm deep) to preserve floor space. This combination delivers immediate visual impact while solving real functional constraints in compact bathrooms.
2. Wall-Mounted Fixtures for Maximum Floor Space
Wall-mounted fixtures are the secret to creating a clutter-free appearance in small bathrooms. By anchoring your toilet, vanity, and even shelving to the wall rather than the floor, you eliminate visual obstruction and gain precious floor clearance that makes the space feel more open.
Wall-mounted toilets require roughing-in during the framing stage, so this works best during a full renovation. The tank sits hidden behind the wall, and only the sleek bowl protrudes. Similarly, wall-hung vanities eliminate the visual weight of cabinet legs and expose the floor beneath, a simple but powerful trick for expanding perceived space.
Shelving mounted above the toilet or beside the sink keeps everyday items accessible without consuming floor real estate. Open shelving works well here because small bathrooms benefit from visual transparency. Avoid closed cabinets that make tight spaces feel more cramped. Spacing shelves 30-38 cm apart and keeping them no deeper than 20-25 cm helps maintain sight lines.
3. Open Concept Wet Room Design
An open concept wet room removes the visual and functional barriers of a traditional shower enclosure, creating a unified bathing space that feels more spacious. The entire floor is waterproofed and sloped toward a linear drain, allowing water to flow freely without a tub or enclosed shower stall.
This design works best in bathrooms where moisture management is properly planned. The floor must slope at least 1/8 inch per foot (approximately 1 cm per 100 cm) toward the drain to prevent pooling. Durable, slip-resistant tile (with a minimum coefficient of friction of 0.60 for wet areas) is essential for safety. The wet room aesthetic also pairs well with statement tiles and textural elements that define the space visually rather than physically.
Wet rooms suit minimalist, modern aesthetics and work particularly well in master bathrooms or primary bathrooms where a spa-like feel is desired. However, they require careful ventilation to manage moisture and prevent mold. A high-capacity exhaust fan rated for the square footage of your bathroom is non-negotiable. The open layout also means water spray may reach adjacent walls, so waterproofing should extend 1.8-2.4 meters from the drain in all directions.
How to Waterproof a Bathroom Shower Floor
Waterproofing a shower floor is one of the most critical steps in any bathroom renovation. A properly waterproofed floor prevents water intrusion into subfloor materials, which leads to rot, mold, and structural damage. The process involves several layers of protection that work together to keep moisture contained.
Start with a sloped base. The subfloor should slope at least 1/8 inch per foot (approximately 1 cm per 100 cm) toward your drain. This ensures water doesn't pool in low spots. Next, apply a waterproof membrane over the entire floor and extend it 15 cm up the walls. Common membrane options include sheet membranes (rolled out and sealed at seams) or liquid membranes (brushed or sprayed on). Liquid membranes are often easier for DIY application because you can see where you've covered and seams are eliminated.
After the membrane cures (typically 24-48 hours depending on product), install your tile and grout. Use a polymer-modified thin-set mortar designed for wet areas; standard thin-set can absorb water and fail over time. After grouting, apply a grout sealer to fill the porous spaces in grout lines. This extra step prevents water from wicking through grout into the membrane below.
The final layer is caulk at the corners and where walls meet the floor. Use a flexible, waterproof caulk (silicone or urethane) rather than rigid grout. This accommodates movement and prevents cracks that would allow water penetration. This layered approach is recommended because each component serves a specific purpose, and removing any step creates a vulnerability.
4. Statement Tiles and Visual Depth
Statement tiles transform small bathrooms by creating focal points that draw the eye and make spaces feel intentional rather than cramped. A bold tile pattern, unusual texture, or unexpected color creates visual interest that distracts from the small footprint.
Large-format tiles (60x60 cm or larger) reduce the number of grout lines, which creates a cleaner, more expansive appearance. Conversely, small mosaic tiles create texture and pattern that adds depth. The key is choosing one statement wall, typically the shower surround or the wall behind the vanity, and keeping other surfaces neutral. This prevents visual chaos in a small space.
Textural elements like subway tiles with a matte finish, hexagonal tiles, or tiles with a slight relief pattern add dimension without overwhelming the eye. Warm white or soft gray tones maintain openness while still providing visual interest. Avoid busy, multi-color patterns that fragment the space visually. A single accent color (say, a deep green or terracotta) applied to one wall creates drama without making the room feel smaller.
The tile selection also affects how light bounces around the space. Glazed tiles reflect light and enhance brightness, while matte finishes absorb light and create a more sophisticated, grounded feel. For small bathrooms, consider mixing finishes: glossy tiles on the shower surround to enhance light, matte tiles on accent walls for visual warmth.
5. Pocket Doors and Space-Smart Layout Configurations
A pocket door slides into the wall cavity rather than swinging into the room, eliminating the arc of space a traditional hinged door requires. In a small bathroom, this reclaimed floor space can be the difference between a cramped layout and a functional one.
Pocket doors work best when your layout allows the door to slide into an adjacent wall cavity, typically a hallway or closet wall.
Building Code Requirements for Bathroom Clearances
Building codes establish minimum clearances around bathroom fixtures to ensure safety, accessibility, and code compliance. These requirements vary slightly by jurisdiction, but most follow similar principles. In Canada, the National Building Code of Canada (NBC) sets the standard for bathroom design.
National Building Code of Canada bathroom design requirements
6. Recessed Shelving and Clutter-Free Storage
Recessed shelving is carved directly into the wall cavity, creating storage without consuming floor or counter space. These shelves sit flush with the wall surface and provide a clean, minimalist aesthetic that's especially valuable in small bathrooms where every visual element matters.
| Layout Approach | Best For | Key Advantage | Primary Consideration |
|---|---|---|---|
| Corner shower + floating vanity | 5x7 to 5x8 bathrooms | Maximizes floor visibility | Requires proper waterproofing |
| Wall-mounted fixtures | Any small space | Creates open-floor feeling | Needs wall reinforcement during framing |
| Wet room design | Modern aesthetic seekers | Spa-like, minimalist look | Demands excellent ventilation |
| Statement tiles | Visual interest priority | Distracts from small footprint | Choose one accent wall only |
| Pocket doors | Limited entry space | Reclaims swing arc | Works only if wall cavity available |
| Recessed shelving | Storage-conscious users | Clutter-free appearance | Easiest during full renovation |
Frequently Asked Questions
What is the most efficient layout for a 5x8 bathroom?
A 5x8 bathroom footprint works best with a corner shower, wall-mounted vanity, and toilet positioned to create an open flow. Placing the vanity opposite the entry maximizes visual depth and reduces the cramped feeling. This layout typically requires 18 inches of clearance in front of each fixture per building code requirements for bathroom clearances, so plan fixture placement accordingly to meet these standards while preserving usable floor space.
How can I make a small bathroom look bigger during a renovation?
Use wall-mounted fixtures to increase visible floor space, choose light color palettes with warm white lighting to create visual expansion, and install statement tiles with linear patterns to draw the eye horizontally. Recessed shelving eliminates clutter and wall-mounted vanities free up the floor. Proper ambient lighting with warm white tones (2700K-3000K CRI) makes the space feel open and inviting without harsh shadows.
What are the top small bathroom design trends for 2026?
Organic minimalism, wet room designs, and statement tile patterns dominate 2026 trends. Floating vanities, corner showers, and textural elements create visual interest in compact spaces. Warm white lighting replaces cool tones, and clutter-free storage through recessed shelving is essential. Wall-mounted fixtures and open-concept layouts maximize the bathroom footprint while maintaining modern functionality.
Are walk-in showers better than tubs for small bathrooms?
Walk-in showers are generally better for small bathrooms because they require less floor space and create an open, uncluttered look. A corner shower configuration maximizes efficiency while a corner tub takes up more square footage. Walk-in showers also work well with wet room designs. However, if you need a soaking tub, consider a compact pedestal or corner model to balance functionality with space optimization.
What is the best way to waterproof a bathroom shower floor in a small space?
Use a quality waterproofing membrane applied to the subfloor before tiling, ensuring all seams and corners are sealed. In small bathrooms, a sloped floor directing water to a centered drain is critical. Apply waterproof tape to corners and transitions, then use large-format tiles with minimal grout lines to reduce moisture penetration. How to waterproof a bathroom shower floor properly prevents costly water damage and ensures the renovation lasts for years.